The Raspberry Pi is a low cost, credit-card sized computer that plugs into a computer monitor or TV,
and uses a standard keyboard and mouse.
It is a capable little device that enables people of all ages to explore computing, and to learn how to program in languages like
Scratch and Python. It's capable of doing everything you'd expect a desktop computer to do, from browsing the internet and playing
high-definition video, to making spreadsheets, word-processing, and playing games.
More information about the Raspberry Pi can be found at:
https://www.raspberrypi.org
Installing Raspbian on Raspberry Pi model B using NOOBS
Information
none
Operating system used
Windows Vista Home Premium SP 1
Hardware used
- Raspberry Pi 1 model B:
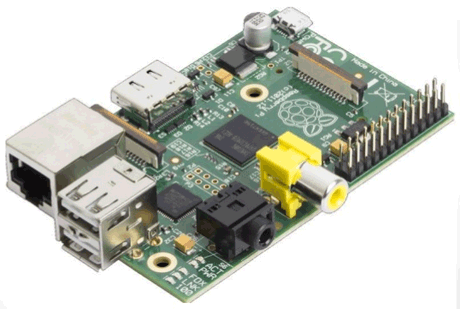
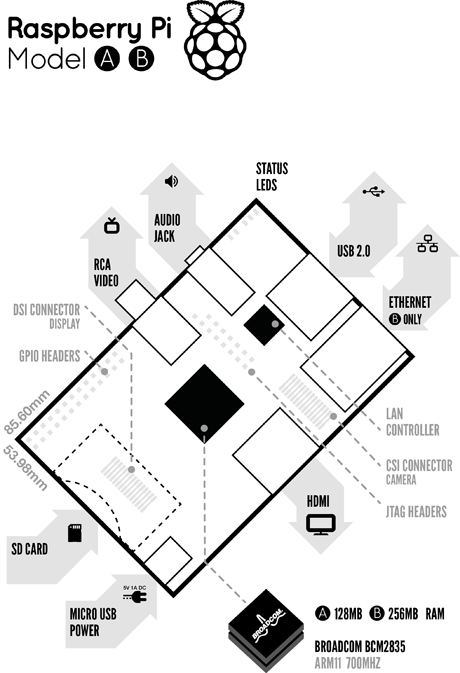
Specifications:
- Memory:
512 MB SDRAM
- Connections:
- two USB 2.0 ports
- one 10/100Mb RJ45 Ethernet jack
- Audio connector: 3.5mm stereo jack (output only)
- HDMI connector providing type A HDMI 1.3a out
- Composite Video connector: RCA
- 26 pin expansion header exposing GPIO, I2C etc
- Camera interface port (CSI-2)
- LCD display interface port (DSI)
- One microUSB power connector for powering the device (5V).
- Processor:
System on a Chip (SoC): Broadcom BCM2835 media processor
This contains an ARM1176JZFS (ARM11 using an ARMv6-architecture core) with floating point, running at 700Mhz, and a Videocore 4 GPU
- Energy usage:
3.5W (700mA)
- Storage:
SD/MMC/SDIO memory card slot (underside)
- 5 Status LEDs:
- D5(Green) - SDCard Access (via GPIO16) - labelled as "OK" on Model B Rev1.0 boards and "ACT" on Model B Rev2.0 and Model A boards
- D6(Red) - 3.3 V Power - labelled as "PWR" on all boards
- D7(Green) - Full Duplex (LAN) (Model B) - labelled as "FDX" on all boards
- D8(Green) - Link/Activity (LAN) (Model B) - labelled as "LNK" on all boards
- D9(Yellow) - 10/100Mbit (LAN) (Model B) - labelled (incorrectly) as "10M" on Model B Rev1.0 boards and "100" on Model B Rev2.0 and Model A boards
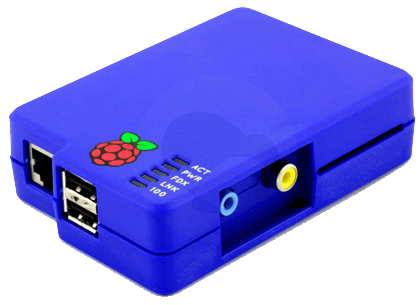
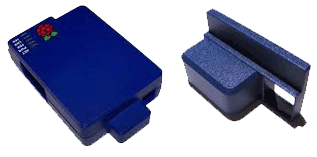
- Cyntech case for the Raspberry Pi 1 model B
- SD Card protection for the Cyntech case
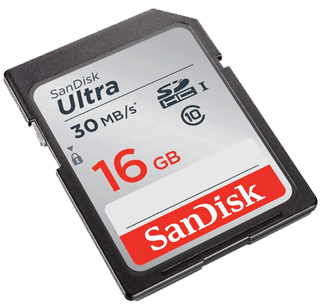
- ScanDisk Ultra SDHC card, 16GB, 30MB/s, class 10
- HDMI 1.4 cable (gold-plated connectors HDMI-A <-> HDMI-A, 1 metre long)
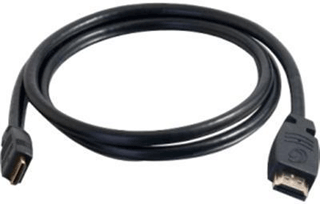
Specifications:
- 3D over HDMI
- HDMI-CEC support
- 4K x 2K video support (3840 x 2160 at 24 Hz/25 Hz/30 Hz, 4096 x 2160 at 24 Hz)
- ARC - Audio Return Channel
- High-Speed (till 10.2 Gbit/s)
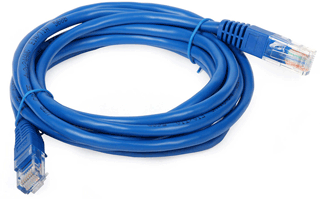
- 1.5m 5ft CAT5 RJ45 Ethernet network cable (1.5 metre long)
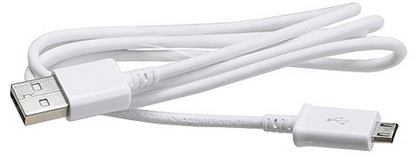
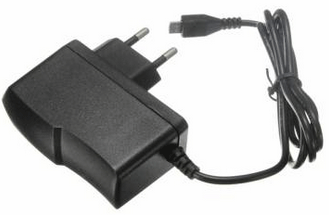
- USB male to micro USB male charging cable (1 metre long)
Note:
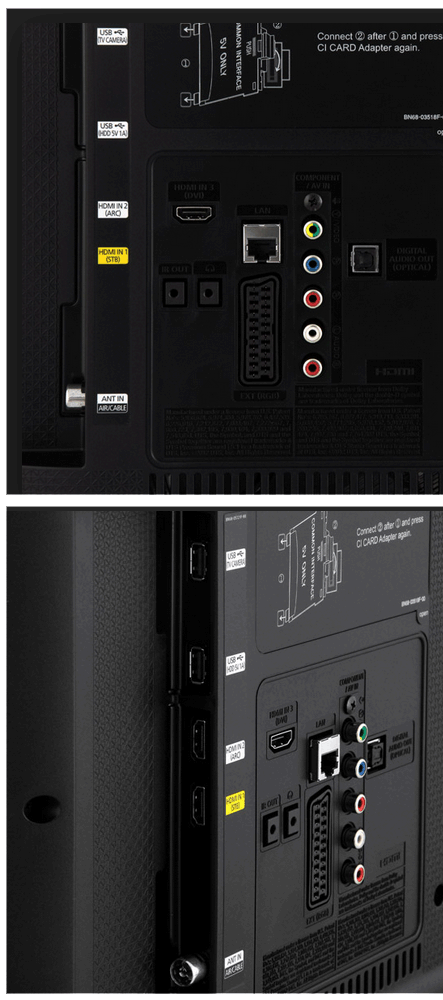
The Samsung UE32H5500AW has an USB port labelled (HDD 5V 1A). This port can be used as the Raspberry Pi power supply.
If your monitor/TV has no such USB port do not buy the USB male to micro USB male charging cable but instead buy a
power supply micro USB AC adapter charger (2A, 5V)
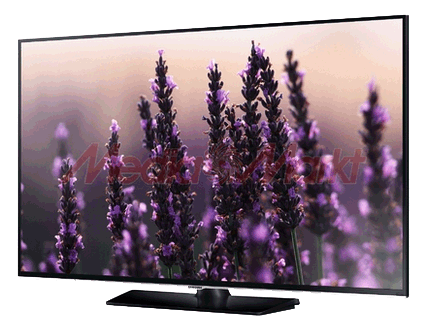
- Samsung UE32H5500AW
Samsung UE32H5500AW back side with the USB ports, HDMI port, etc.
Software prerequisites
none
Procedure
- Download the SD Card Formatter from https://www.sdcard.org/downloads
It will later be used to format the SD card.
In this tutorial we will be using the SD Formatter for Windows.
- Uncompress the SDFormatterv4.zip file and install the SDFormatter.
- After installation start the SDFormatter.
- Insert the SD card into the SD card adapter of your laptop/PC.
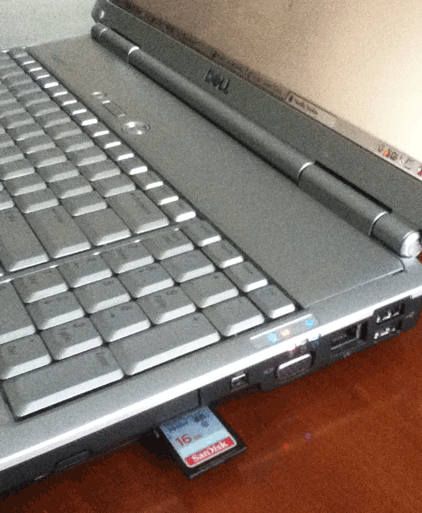
- Make sure you select the correct drive letter where the SD Card can be found.
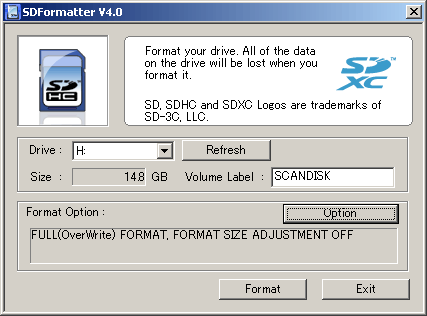
- Enter a volume label, for example: SCANDISK
- Press the Option button and select:
- FORMAT TYPE: FULL (OverWrite)
- FORMAT SIZE ADJUSTMENT: OFF
- Now press the Format button.
- The SD Card is now being formatted.
Please be patient it may take a while (approx 15 min for a 16 GB card)

- When the formatting is finished you will see a message:
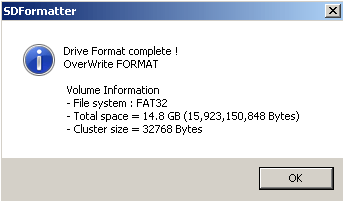
- Press the Ok and Exit button.
- Download the easy operating system install manager for the Raspberry Pi called NOOBS (New Out Of the Box Software) from https://www.raspberrypi.org/downloads/noobs/
The contents of this zip file will later be written to the SD Card.
In this tutorial the NOOBS (version 1.5.0) is used.
- To verify if this zip file is not tempered with, check the SHA1 Hash:
- Open a Dos window and type: sha1sum NOOBS_v1_5_0.zip
- You should see the SHA1 Hash: 554d92718374c1b2eff1dffbea04f44b5dfbbaa5
- Uncompress NOOBS_v1_5_0.zip using Winzip to a folder, for example c:\mynoobs
- Copy the contents of folder c:\mynoobs to the SD Card (do not copy the folder mynoobs)
Note: The total filesize is approx 1.03 GB.
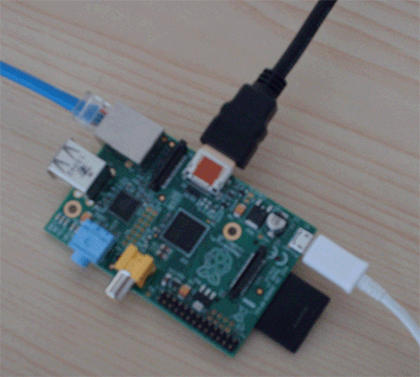
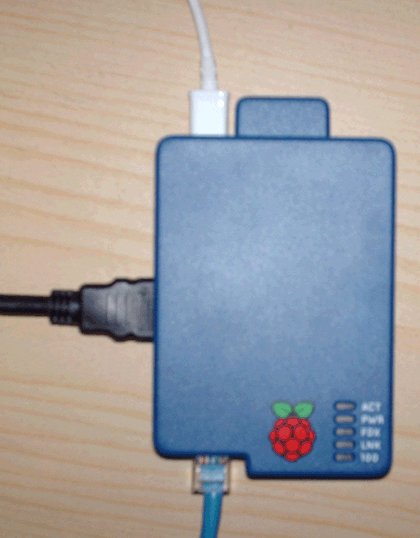
- Put the SD Card in the Raspberry Pi and place the Raspberry Pi inside the Cyntech case together with the SD Card protection.
Picture of the Raspberry Pi without its protective case, but with all its cables connected.
Picture of the Raspberry Pi with its protective case and with all its cables connected.
Note:
The Cyntech case together with the SD Card protection is not required but it is recommended to protect your Raspberry Pi.
- Connect a mouse and keyboard to the Raspberry Pi USB slots.
- Connect the Raspberry Pi to the Samsung UE32H5500AW.
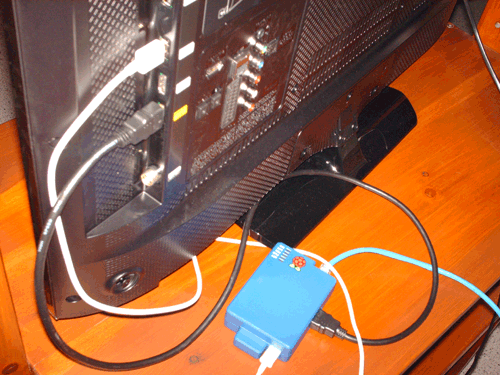
- USB male to micro USB male charging cable (white cable in picture):
Connect the USB male to the Samsung UE32H5500AW USB port labelled "HDD 5V 1A".
- HDMI 1.4 cable (black cable in picture):
Connect the HDMI connector to the Samsung UE32H5500AW HDMI port labelled "HDMI in 1 (STB)".
- Ethernet network cable (blue cable in picture):
Connect the other end of the network cable to your router.
- Turn on the Samsung UE32H5500AW, the NOOB install manager is now running.
Click Yes at the warning dialog.
- Select option: Raspbian and press the Install button.
- Raspbian is now being installed on the SD card (takes approx 20 min).
After installation press the OK button.
- Raspbian is being rebooted into the GUI environment.
- Open a terminal (the 4th icon on the top) and type: ifconfig
You will see the ip address (eth0, inet addr) which you can use to access the raspberry pi remotely, for example:
192.168.1.69
- To access the Raspberry Pi GUI from your Windows laptop using Remote Desktop Connection,
you need to install the xrdp service on the Raspbian. To install this service, type in the terminal:
- sudo apt-get install xrdp
- Type: Y [Enter] to continue
- The packages are downloaded from internet and installed.
- Start the Remote Desktop Connection on your laptop, enter the ip address, for example: 192.168.1.69 and press the Connect button.

- A warning message is displayed, press Yes button.
- Log into to xrdp using the default Raspbian default account:
Select module: sesman-Xvnc
Enter username: pi
Enter password: raspberry
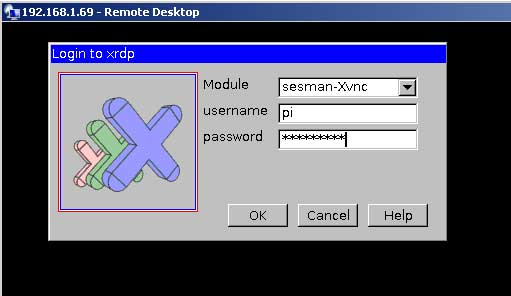
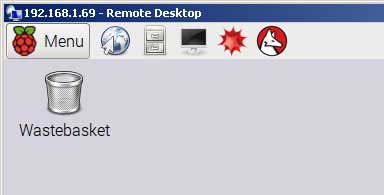
Press OK button and a few seconds later you will see the Raspbian GUI.
|
|