Libnfc is an open source Near Field Communication (NFC) C library that allows you to communicate with NFC devices.
It is a low level NFC SDK and Programmers API released under the GNU Lesser General Public License and provides developers
a way to work at higher level of abstraction with the NFC hardware.
All major operating systems are supported, including GNU/Linux, Mac OS X and Windows.
More information about libnfc can be found at:
http://nfc-tools.org
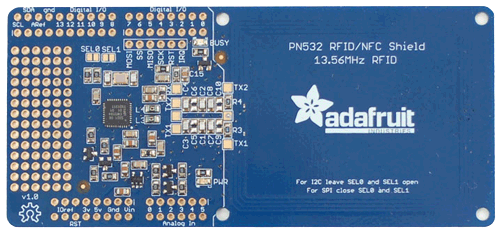
Connecting Adafruit PN532 RFID/NFC Shield v1.0 to a Windows laptop, via libnfc
Information
This tutorial explains how to connect an Adafruit PN532 RFID/NFC Shield v1.0 to a Windows laptop, via libnfc.
Adafruit also sells another NFC product called
Adafruit PN532 RFID/NFC Breakout Board
This tutorial ONLY applies to the Adafruit PN532 RFID/NFC Shield v1.0 and not to the Adafruit PN532 RFID/NFC Breakout Board.
The Adafruit PN532 RFID/NFC Shield v1.0 will not be connected to an Arduino board.
Arduino will not be used in this tutorial.
Operating system used
Windows Vista Home Premium SP 2
Hardware used
Software prerequisites
Libnfc on Windows
Procedure
- Prepare Adafruit PN532 RFID/NFC Shield v1.0
Libnfc currently only supports communication over UART.
To use UART on Adafruit PN532 RFID/NFC Shield v1.0 do the following:
- SEL0 should be OPEN, and SEL1 CLOSED.
- Melt a blob of solder to bridge across the copper pads at SEL1.
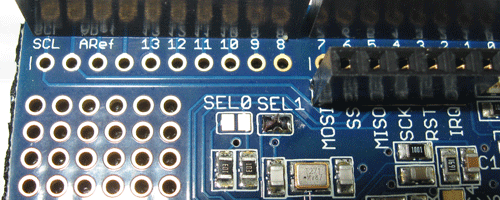
- Make sure that there is NO connection between the pads at SEL0.
Note 1:
Once you do this, the NFC shield will no longer work with Arduino, since the NFC shield is no longer
configured to communicate with either SPI or I2C. If you want to go back to using the NFC shield with the
arduino, you will have to undo the changes you made to SEL1.
Note 2:
There is a minor issue with the current version of the Adafruit PN532 RFID/NFC Shield v1.0. SEL0 and SEL1 are reversed on the silkscreen,
so SEL0 is actually SEL1 and vice versa. This only affects users who wish to use UART or SPI to communicate with the PN532 instead of the default I2C,
which is the communication bus supported by Adafruit's PN532/NFC library for Arduino. This will be updated on the next version of the boards.
Note 3:
More detailed information:
Adafruit PN532 RFID/NFC Shield v1.0 large image
Adafruit PN532 RFID/NFC Shield v1.0 schematic
Adafruit PN532 RFID/NFC Shield v1.0 board
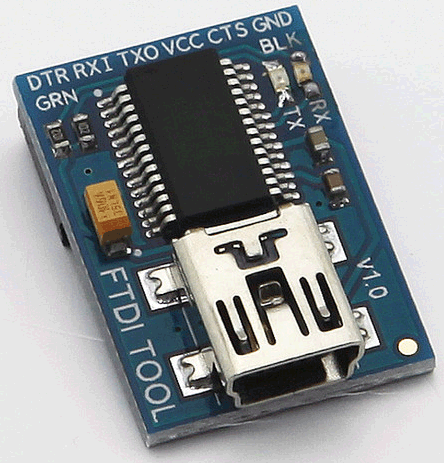
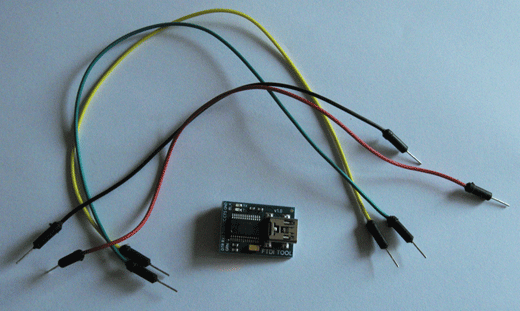
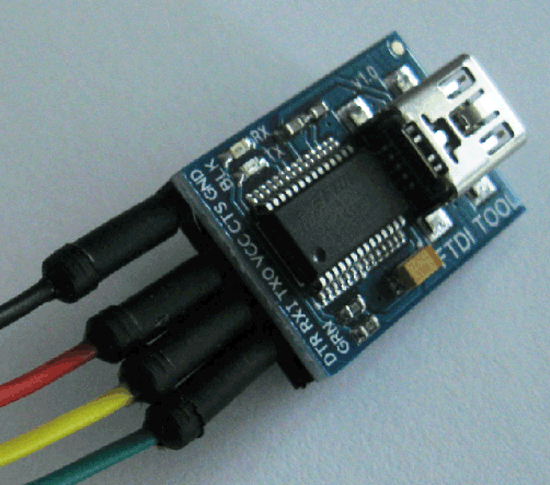
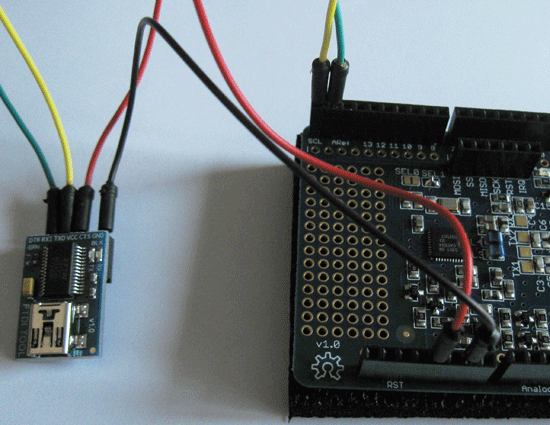
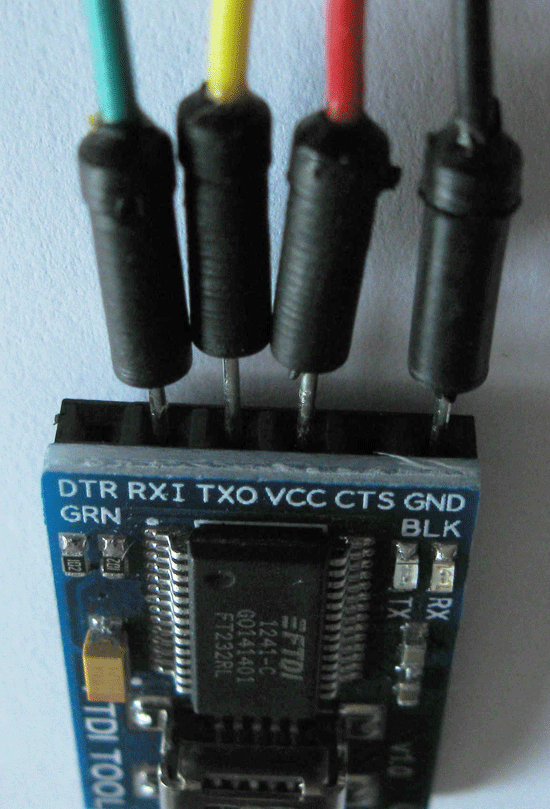
- Connect FTDI tool to Adafruit PN532 RFID/NFC Shield
Use the FTDI tool at 5V (3.3V will not work with the NFC shield).
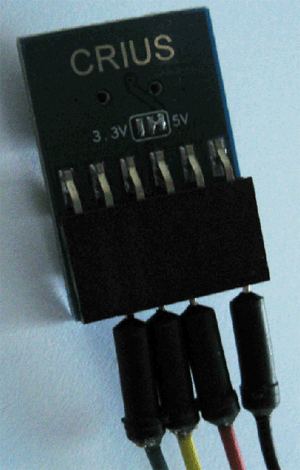
There are 2 methods to connect the FTDI board to the NFC shield. Choose one of the methods:
Method 1:
- Connect 5V from the FTDI board to 5V on the NFC shield (red wire)
- Connect GND from the FTDI board to GND on the NFC shield (black wire)
- Connect TXO from the FTDI board to SS on the NFC shield (yellow wire)
- Connect RXI from the FTDI board to MOSI on the NFC shield (green wire)
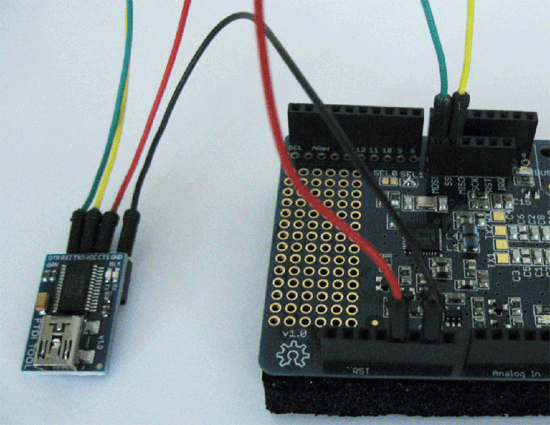
Method 2:
- Connect 5V from the FTDI board to 5V on the NFC shield (red wire)
- Connect GND from the FTDI board to GND on the NFC shield (black wire)
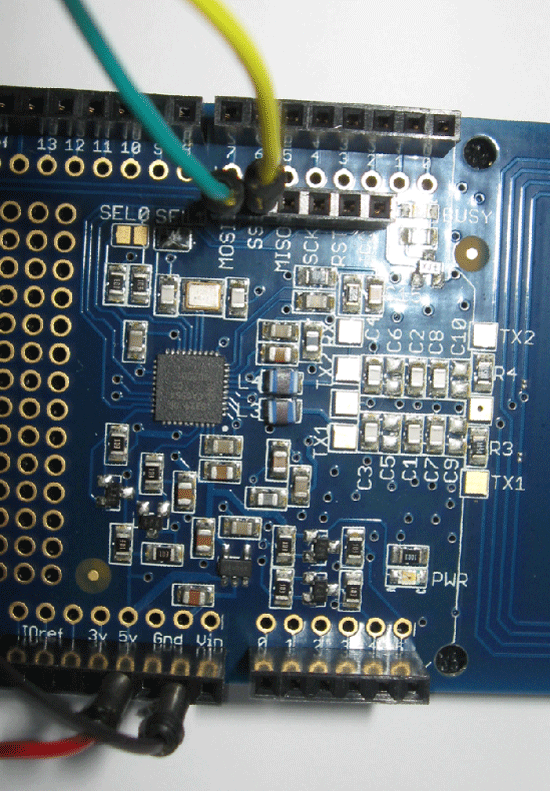
- Connect TXO from the FTDI board to SCL port (top left corner) on the NFC shield (yellow wire)
- Connect RXI from the FTDI board to SDA port on the NFC shield (green wire)

More screenshots:
- Connect FTDI tool to laptop
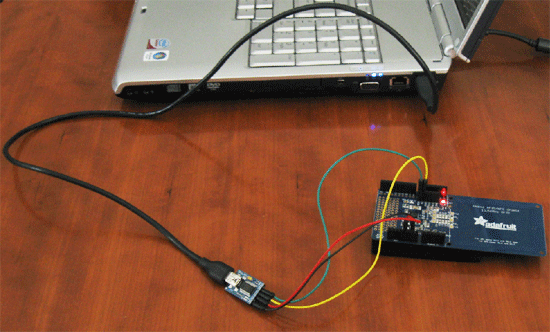
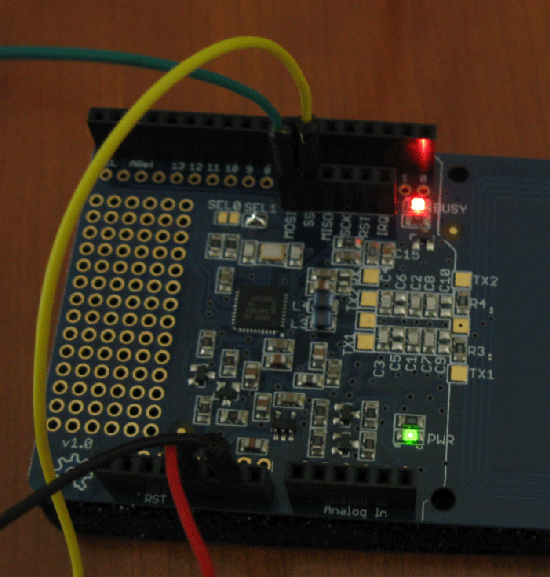
- The two leds on the Adafruit NFC shield BUSY and PWR are on.
- On your screen you will see the message:
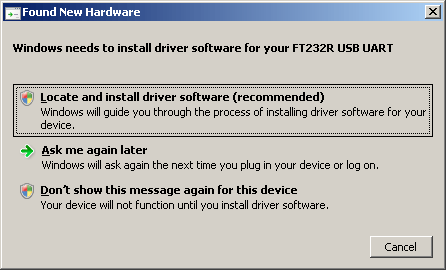
Windows needs to install driver software for your FT23R USB UART
Select option: "Locate and install driver software (recommended)".
- Windows has found new hardware. Allow window to search online for driver software for your FT23R USB UART.
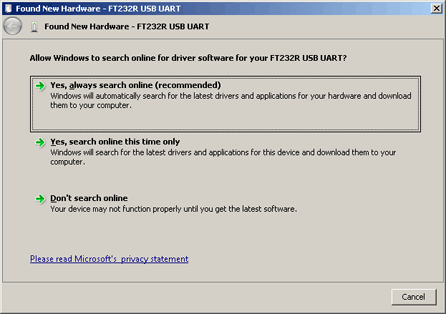
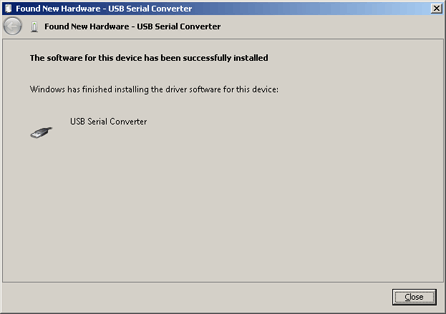
- Window will search for the FT23R USB UART driver software. It make take several minutes, so please be patient. After it has found it, Window will download and install it.
Note:
If Windows can not automatically find the FT23R USB UART driver software, you can find it at:
https://ftdichip.com/drivers/vcp-drivers/
Download and install the Virtual COM port (VCP) driver.
- To verify the installed driver software:
- Press the windows "Start" button
- In the text box enter: devmgmt.msc
- The "Device Manager" windows opens, expand "Universal Serial Bus controllers".
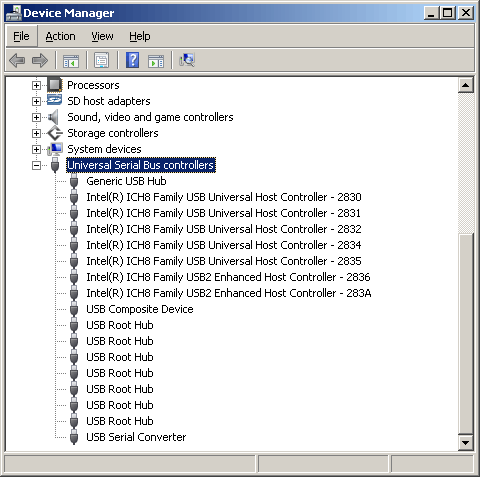
- Right click "USB Serial Converter" and select Properties.
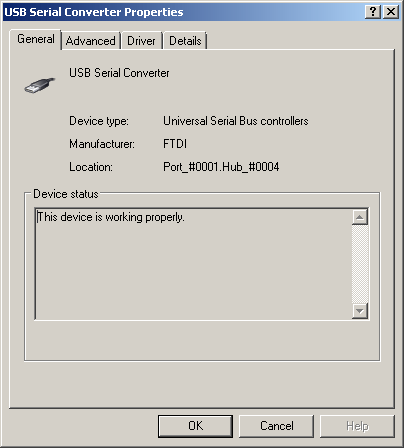
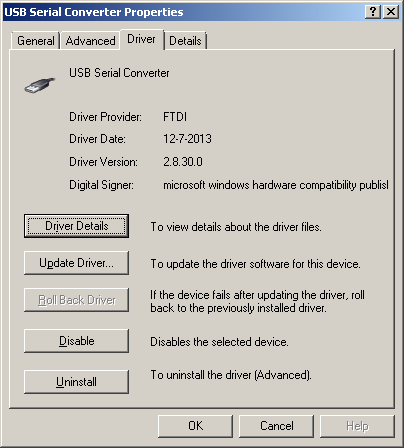
- Select tab Driver.
Windows has installed the following driver software:
- Driver Provider: FTDI
- Driver Date: 12-7-2013
- Driver version: 2.8.30.0
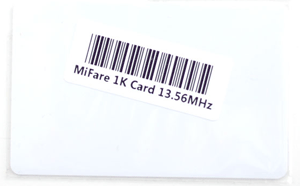
- Scan Mifare Classic card
If you have followed the tutorial
Installing libnfc on Windows and create executables and libnfc.dll
successfully and your Adafruit PN532 RFID/NFC Shield v1.0 is prepared and connected to your laptop you can now execute the libnfc commands.
- Try to detect the attached Adafruit PN532 RFID/NFC Shield.
- Open a dos window
- Goto C:\libnfc-build\utils
- Type:
nfc-list
This should list the devices that were detected.
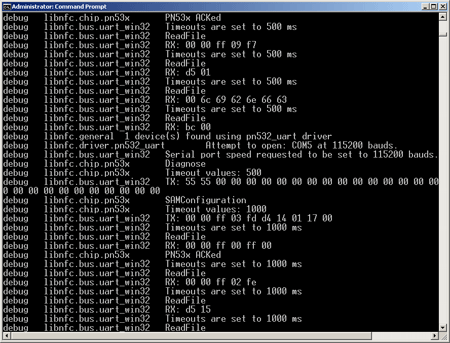
See the complete nfc-list output.
- Use the nfc-poll example to wait 30 seconds for an ISO14443A card or tag and display some
basic information about this card.
- Open a dos window
- Goto C:\libnfc-build\examples
- Type:
nfc-poll
- Place a Mifare Classic card over the Adafruit PN532 RFID/NFC Shield.
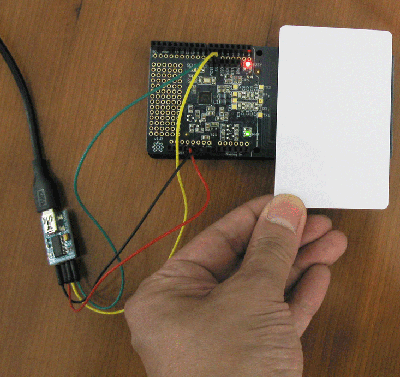
- This should give you some basic information on any card that entered the magnetic field within the specified delay.
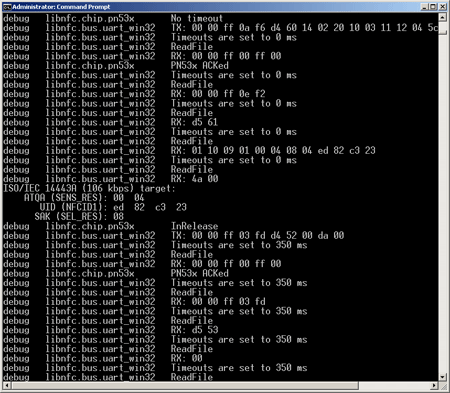
See the complete nfc-poll output.
|
|