LoRaWAN (Long Range Wide Area Network) is a specification for a telecommunication network suitable for long-distance communication with little power.
The technology is used for machine-to-machine communication (Internet of Things).
The architecture consists of gateways, network servers and application servers. There are RF chips from Semtech used to transmit a spread spectrum.
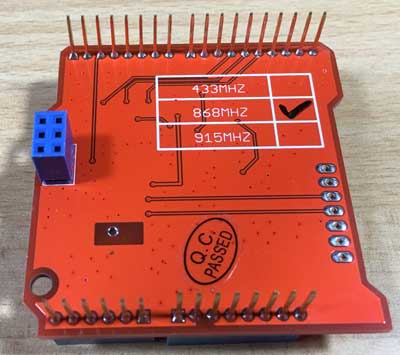
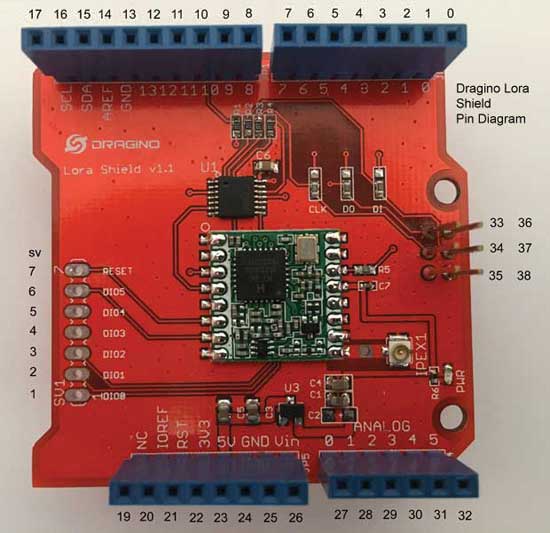
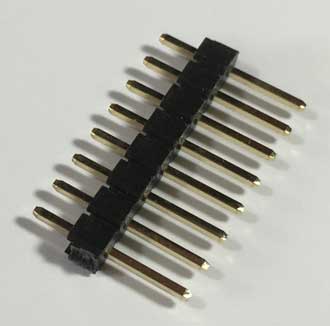
Bottom view. The frequency used in Europe is 868 MHz, for the U.S. 900 MHz and in China, Japan and Korea 433 MHz. Make sure your LoRa shield has the correct frequency.
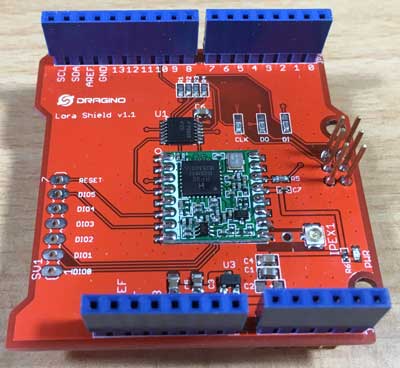
The LoRa Shield v1.1 is equiped with HopeRF RFM95W-868-S2. This module is marked RF96 which means the chip is using the SX1276 chip.
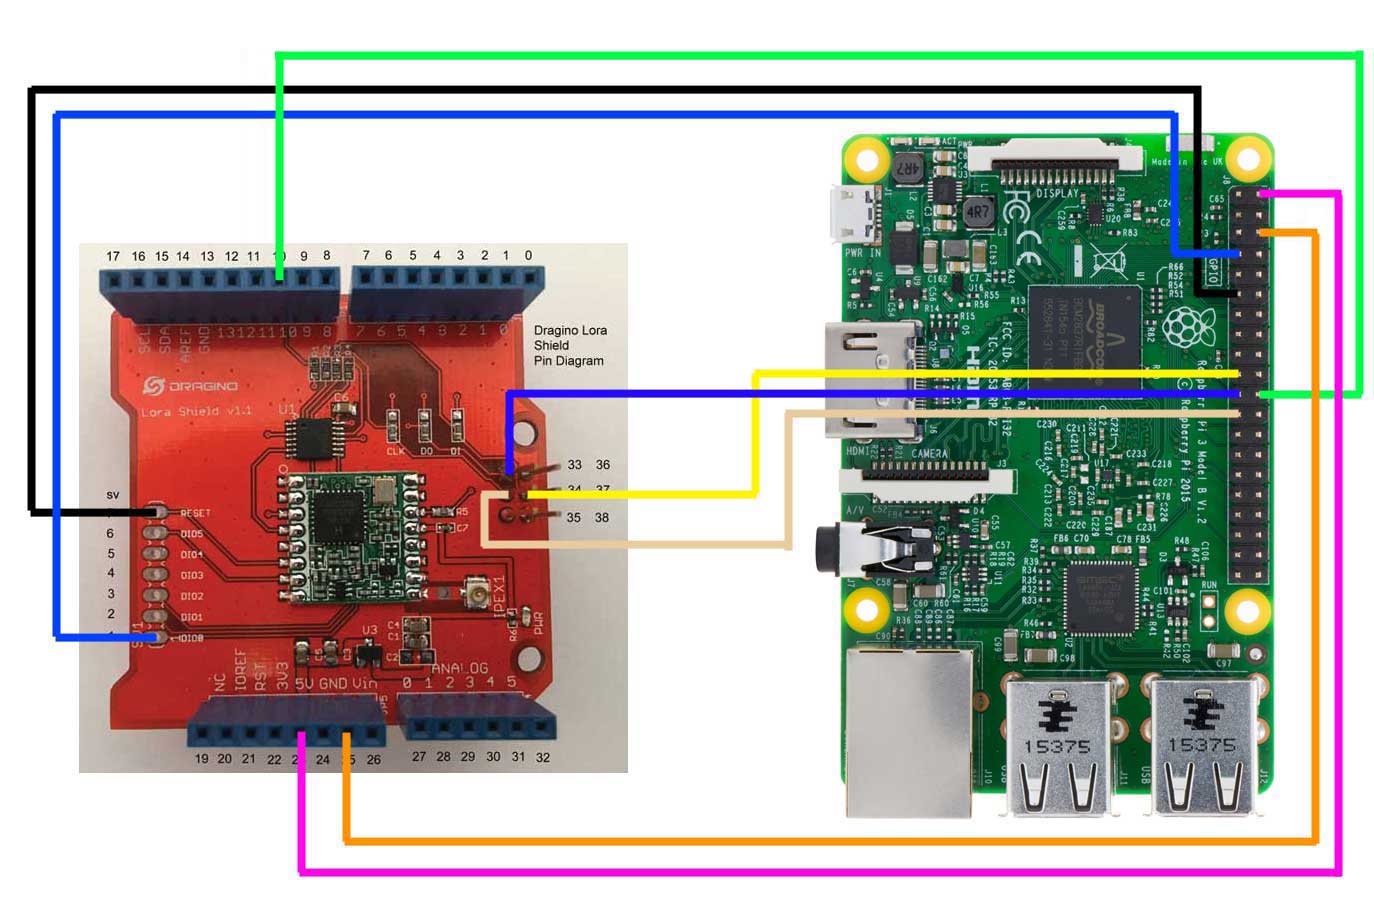
Dragino LoRa Shield v1.1 with pin diagram.
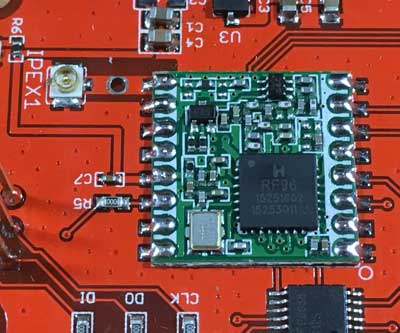
Note: Pin 33, 34 and 35 are located nearest to the RF96 chip
Connect a mouse, keyboard, ethernet cable and monitor cable to the Raspberry Pi.
Connect the power cable, the NOOB install manager is now running.
Click Yes at the warning dialog.
Select option: Raspbian and press the Install button.
Raspbian is now being installed on the micro SD card.
After installation press the OK button.
Raspbian is being rebooted into the GUI environment.
Instead of an ethernet cable, the Raspberry Pi can be connected to a router via WIFI.
In the top right corner, select the network icon (two screen monitors) and select your WIFI network and enter
the password authentication.
To see what the Raspberry Pi ip address is, hover your mouse over the network icon (two screen monitors or WIFI symbol).
You will see the ip address (eth0, wlan0) which you can use to access the Raspberry Pi remotely, for example:
192.168.1.69
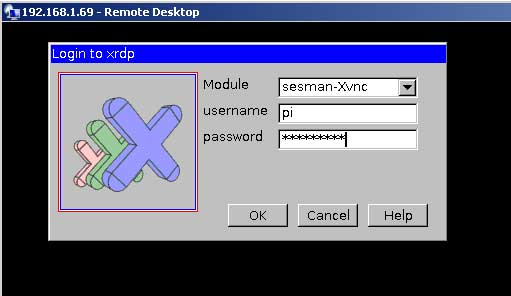
To access the Raspberry Pi GUI from your Windows laptop using Remote Desktop Connection,
you need to install the xrdp service on the Raspbian. To install this service, type in the terminal:
sudo apt-get install xrdp
Type: Y [Enter] to continue
The packages are downloaded from internet and installed.
Start the Remote Desktop Connection on your laptop, enter the Raspberry Pi ip address, for example: 192.168.1.69 and press the Connect button.
A warning message is displayed, press Yes button.
Log into to xrdp using the default Raspbian default account:
Select module: sesman-Xvnc
Enter username: pi
Enter password: raspberry
Press OK button and a few seconds later you will see the Raspbian GUI.
Install the Samba package so the Raspberry Pi can be accessed by its hostname from a Windows machine instead of its ip address.
The ip address can change because the Raspberry Pi gets its ip address via DHCP:
Type: sudo apt-get -y install samba
By default the Raspberry Pi hostname is: raspberrypi
To change the hostname:
Type: sudo raspi-config
Select: 9 Advanced Options
Select: A2 Hostname
Select: Ok
Enter your new hostname
Select: Ok
If you want to access the Raspberry Pi filesystem using the iMac Finder install the Appletalk protocol on the Raspberry Pi.
Goto the Raspberry Pi and do the following:
Type: sudo apt-get install netatalk
Open Finder, type: afp://192.168.1.69
Reboot the Raspberry Pi
Start the Remote Desktop Connection on your laptop, enter the Raspberry Pi hostname, for example: raspberry and press the Connect button.
Install latest updates, open a terminal:
Type: sudo apt-get update
Type: sudo apt-get upgrade
Make sure the GPIO access library "wiringpi" is installed:
Open a terminal and type: sudo apt-get install wiringpi
Select Menu | Preferences | Raspberry Pi configuration
Select tab Interfaces and enable SPI
Install and build the Single Channel LoRaWAN Gateway on your Raspberry Pi:
Open a terminal on your Raspberry Pi.
Create a directory, type: mkdir lorawan_gateway
Goto the directory, type: cd lorawan_gateway
Download the Single Channel LoRaWAN Gateway, type: git clone https://github.com/tftelkamp/single_chan_pkt_fwd.git
Goto the sub directory, type: cd single_chan_pkt_fwd
Edit file main.cpp, type: sudo nano main.cpp
Make changes to the configuration according to your situation (look for: "Configure these values!") :
/**************************************************************
*
* Configure these values!
*
*************************************************************/
// SX1272 - Raspberry connections
int ssPin = 6;
int dio0 = 7;
int RST = 0;
// Set spreading factor (SF7 - SF12)
sf_t sf = SF7;
// Set center frequency
uint32_t freq = 868100000; // in Mhz! (868.1)
// Set location
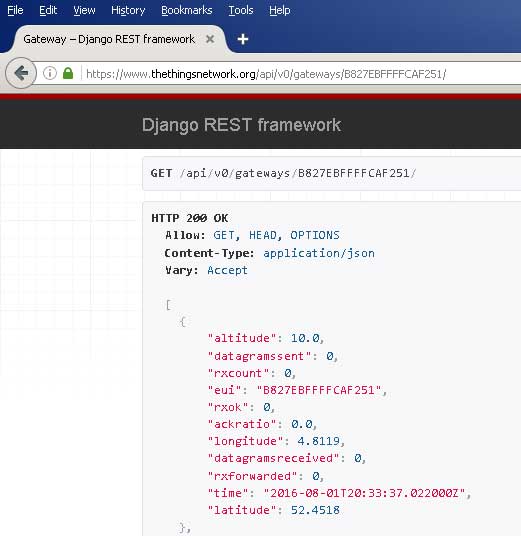
float lat=52.4518;
float lon=4.8119;
int alt=10.0;
/* Informal status fields */
/* platform definition */
static char platform[24] = "Single Channel Gateway";
/* used for contact email */
static char email[40] = "[email protected]";
/* used for free form description */
static char description[64] = "Mobilefish.com LoraWAN Gateway";
// define servers
// The Things Network: router.eu.thethings.network
#define SERVER1 "52.169.76.203"
// The port on which to send data
#define PORT 1700
Write the changes to file, type: CTRL+O
Exit the file: CTRL+X
In the sub directory "single_chan_pkt_fwd" compile the code, type: make
A packet forwarder executable file single_chan_pkt_fwd is created.
Shutdown the Raspberry Pi and remove power from the Raspberry Pi.
Solder the antenna and male pin headers to the Dragino LoRa shield.
See my YouTube movie: Dragino LoRa shield, part 1
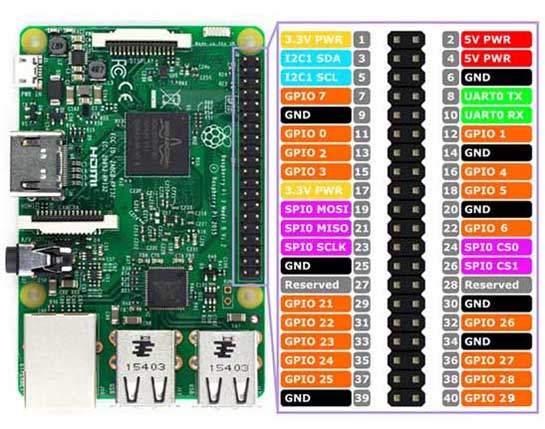
Make the following jumper wire connections, see the pin diagrams, between the Dragino LoRa Shield and the Raspberry Pi 3 model B.
Dragino LoRa shield v1.1
Raspberry Pi 3 model B
Pin
Description
Pin
Description
23
5V
2
5V
25
GND
6
GND
33
(DO_A) MISO
21
SPI_MISO
37
(DI_A) MOSI
19
SPI_MOSI
34
(CLK_A) SCK
23
SPI_CLK
10
(CS_A) NSS
22
GPIO6
SV pin 1
DIO 0
7
GPIO7
SV pin 7
RESET
11
GPIO0
Wiring Dragino LoRa Shield v1.1 and Raspberry Pi 3 model B.
Click on the image for a larger image.
Additional information: Connect Dragino LoRa Shield v1.1 to Raspberry Pi 3 model B, part 2.
Make sure the Raspberry Pi has internet access.
Power up the Raspberry Pi and login to the Raspberry Pi.
Open a terminal and type: cd lorawan_gateway/single_chan_pkt_fwd
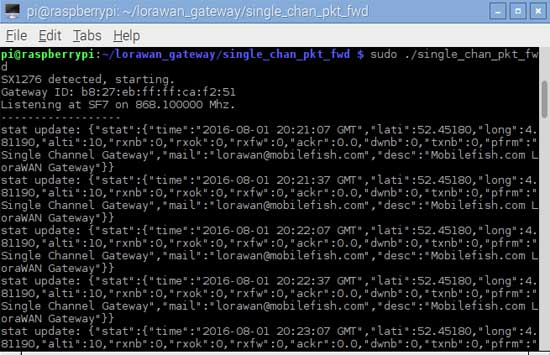
Startup the packet forwarder executable, type: sudo ./single_chan_pkt_fwd
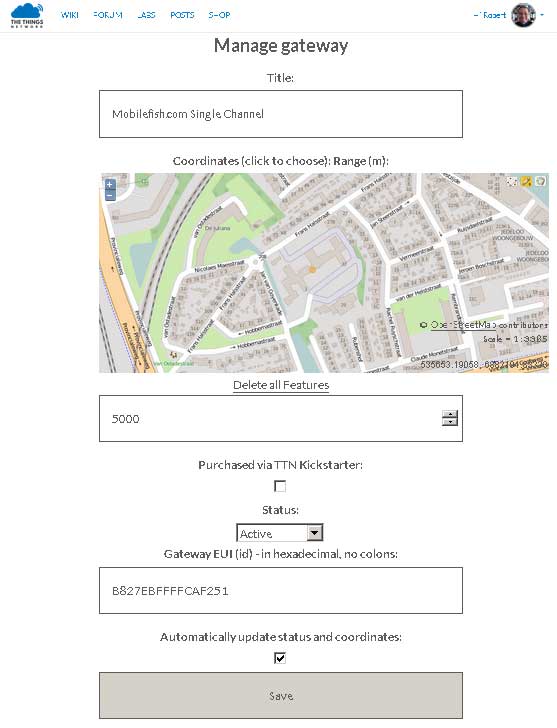
Write down your Gateway ID (for example: b8:27:eb:ff:ff:ca:f2:51). You will need it later.
If the packet forwarder shows the message: "unrecognized transceiver" the Raspberry Pi can not detect the LoRa shield.
Check all your wiring and try it again.
Create an account on The Things Network (TTN)
Provide your email address, username, first and last name.
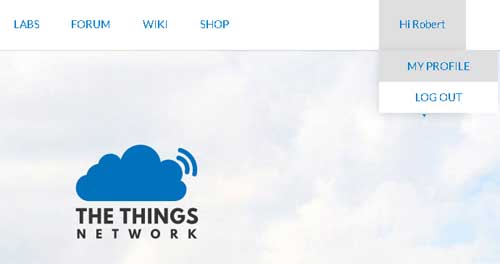
Once your account has been activated, log in and goto to The Things Network homepage https://www.thethingsnetwork.org
If you see the Login button press it and you will see:
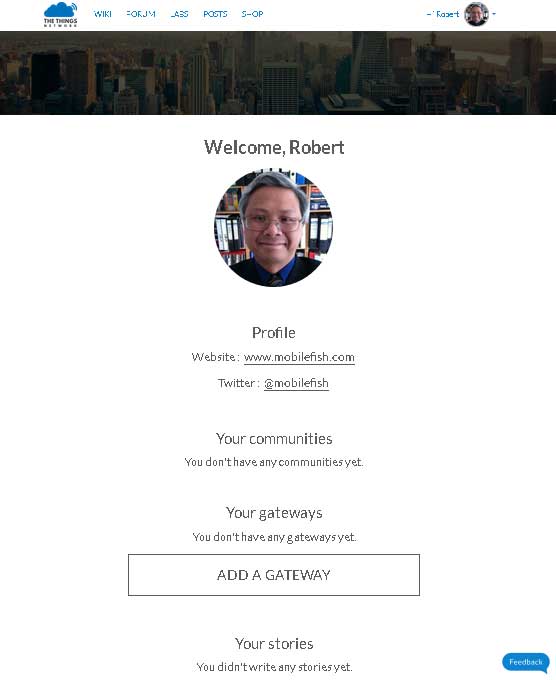
Select "My Profile"
You can add your website and twitter handle. Press the button "ADD A GATEWAY"