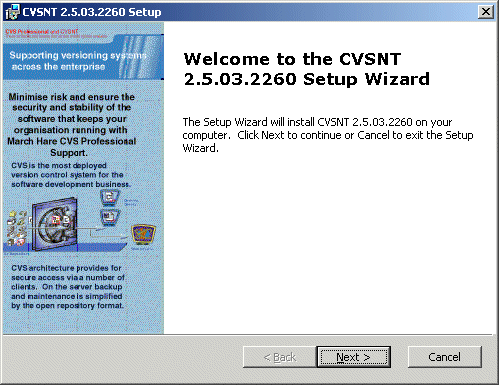
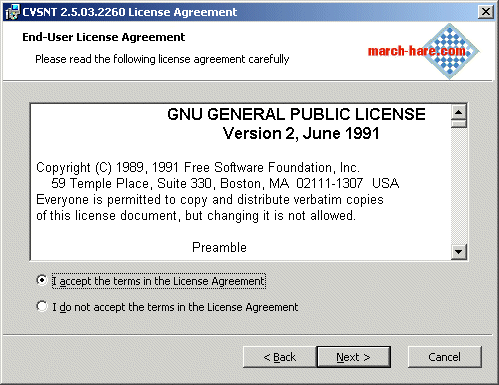
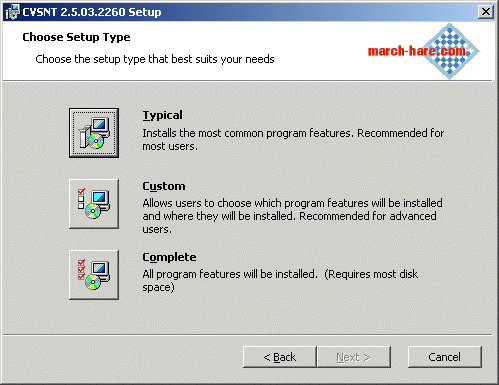
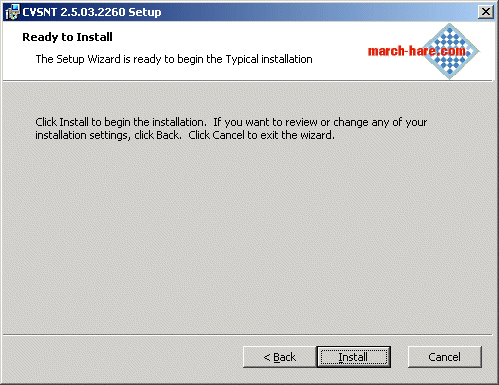
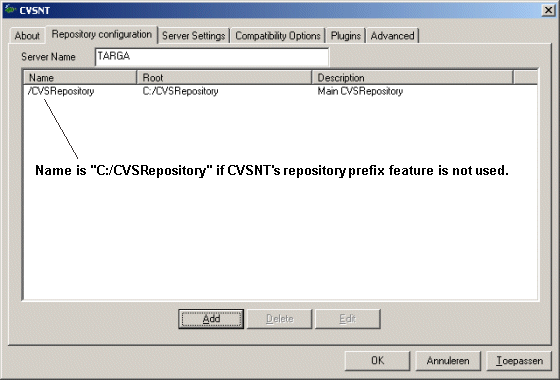
CVSNT


CVS (Concurrent Versions System) is an open-source network-transparent version control system for individual developers to large, distributed teams.

CVSNT is made available under the terms of the GNU General Public License and can be installed on Windows (NT, 2000, XP) Linux and Unix installations.

The latest CVSNT version can be downloaded from: http://www.cvsnt.org

A GUI front-end for CVS can be downloaded from: http://www.wincvs.org/


Installing CVSNT 2.5.03


Information
If you are upgrading CVSNT 2.0.51 make sure you make a backup of the CVS repository.

Uninstall the CVSNT 2.0.51 version before you continue with this guide.

Operating system used
Windows XP Home Edition Version 5.1 SP 2

Software prerequisites
none

Procedure
  1. Login in Windows XP as a user with administrator rights, e.g.: Mainuser

  2. Download Windows install: cvsnt-2.5.03.2260.msi

  3. Run cvsnt-2.5.03.2260.msi and press Next button.

    CVSNT Setup

  4. Accept license agreement and press Next button.

    CVSNT License

  5. Select Typical setup type.

    CVSNT Setup type

  6. Press Install button.

    CVSNT install

  7. The installation starts.

    CVSNT install start

  8. Press Finish button to complete the setup.

    CVSNT setup complete

  9. Restart the system for the configuration changes to take effect. Press Yes button.

    CVSNT restart system.

  10. If you have an existing CVS repository and repository temp directory you can skip this step.

    After your system is rebooted, create a repository directory, e.g.: c:\CVSRepository
    Create a repository temp directory, e.g.: c:\CVSTemp

    Note 1: The repository must reside on a local NTFS file system (networked drives as well as FAT systems are not supported).

    Note 2: Do not create a repository with spaces in the path or in its directory name.

  11. Select menu option CVSNT Control Panel.

    CVSNT control panel


  12. Stop the CVSNT Service if it is running.

    CVSNT about

  13. Select tab "Repository configuration" and press the Add button.

    CVSNT repository configuration

  14. Select the ellipsis button to locate the CVS repository location and change the settings as mentioned below:

    Enter Name: /CVSRepository
    Enter Description: Main CVSRepository
    Enable: Publish Repository
    Enable: Default Repository
    Enable: Online

    CVSNT server settings

    ATTENTION:
    If you intend to connect Eclipse to this CVS Repository you MUST change Name: /CVSRepository into C:/CVSRepository (use full path!)

    Eclipse doesn't like CVSNT's Repository prefix feature!

    CVS Prefix

    Press OK Button

  15. The following message is displayed if the CVSRepository was not initialised:

    CVSNT repository initialise

    Press Yes (=Ja) Button.

  16. The CVSNT Repository is added. Press the "Server Settings" tab.

    CVSNT repository added

  17. Make the following changes:

    Default domain: TARGA (=your server name)
    Temporary Directory: C:\CVSTemp

    CVSNT server settings

  18. Press the "Compatibility Options" tab. Leave the settings unchanged.

    CVSNT compatibility options

  19. Setup sserver protocol

    Skip this step if you do not want to use the sserver protocol.

    CVSNT can also be setup to use the sserver protocol. This means an SSL communication between a client for example Eclipse and the CVSNT server.

    A simple overview of this process can be found here below:

    • Eclipse connects to the CVSNT server.
    • Eclipse asks to start a secure session with the CVSNT server using the sserver protocol.
    • CVSNT server returns the CA certificate (= ca.pem) which also includes the server public key.
    • Eclipse creates a session key, which is encrypted with the server's public key, which is then sent to the CVSNT server.
    • The CVSNT server then decrypts this information using its private key (cvsnt-default.pem).
    • Both Eclipse and the CVSNT server now are using the same session key. This is a symmetric key used to encrypt and decrypt data exchanged by Eclipse and the CVSNT server.

    In the C:\Program Files\CVSNT installation directory you can find the following two files:

    • ca.pem

      This is the ABA.ECOM Root CA certificate which also contains the public key.

      CVSNT ca certificate

    • genkey.exe

      With this program you can generate the cvsnt-default.pem private key:

      • Open a dos window
      • Type: cd C:\Program Files\CVSNT
      • Type: genkey cvsnt-default.pem
      • The file C:\Program Files\CVSNT\cvsnt-default.pem is created.

    To setup the sserver protocol press the "Plugins" tab.

    • Select ":sserver:protocol" and press Configure button.

      CVSNT plugins

    • Enter the following:

      • Make sure the checkbox "Plugin enabled" is enabled.

      • Use the ellipsis buttons to locate the corresponding files as shown below:

        Certificate file: C:\Program Files\CVSNT\cvsnt-default.pem
        Private key file: C:\Program Files\CVSNT\cvsnt-default.pem
        Authentication: Passwords Only

        Set BOTH Certificate and Private key file to cvsnt-default.pem.

        CVSNT protocol

      • Select Authentication: Passwords Only

    • Press OK button.

  20. Setup pserver protocol

    Skip this step if you do not want to use the pserver protocol.

    To setup the pserver protocol press the "Plugins" tab.

    • Select ":pserver:protocol" and press Configure button.

      CVSNT plugins

    • Make sure the checkbox "Plugin enabled" is enabled.

      CVSNT pserver protocol

    • Press OK button.

  21. Press the "Advanced" tab. Leave the settings unchanged.

    CVSNT advanced

  22. CLICK THE APPLY (= Dutch: Toepassen) BUTTON and then the OK button.

  23. Select tab "About", start the CVSNT Service and press OK button.

    CVSNT about

  24. CVSNT is setup and running.

  25. To check if CVSNT is installed correctly, type: cvs -version
    You should see:

    Concurrent Versions System (CVSNT) 2.5.03 (Scorpio) Build 2260 (client/server)

  26. To display the cvs usage, type: cvs --help
    You should see:

    Usage: cvs [cvs-options] command [command-options-and-arguments]

    where cvs-options are -q, -n, etc.
    (specify --help-options for a list of options)

    where command is add, admin, etc.
    (specify --help-commands for a list of commands
    or --help-synonyms for a list of command synonyms)

    where command-options-and-arguments depend on the specific command
    (specify -H followed by a command name for command-specific help)

    Specify --help to receive this message

    The Concurrent Versions System (CVS) is a tool for version control.
    For CVS updates and additional information, see
    the CVSNT home page at http://www.cvsnt.org/


  27. To display a list of cvs commands, type: cvs --help-commands
    To display a list of command synonyms, type: cvs --help-synonyms
    To display the usage of a command, type: cvs -H command or download cvs 2.5.03 command help file.

    CommandSynonymDescription
    add ad newAdd a new file/directory to the repository
    admin adm rcsAdministration front end for rcs
    annotate annShow last revision where each line was modified
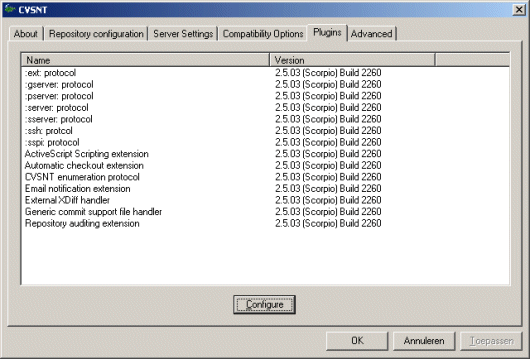
    authserver pserverAuthentication server mode
    chacl setacl setpermChange the Access Control List for a directory
    checkout co getCheckout sources for editing
    chown setownerChange the owner of a directory
    commit ci comCheck files into the repository
    diff di diffShow differences between revisions
    edit  Get ready to edit a watched file
    editors  See who is editing a watched file
    export exp exExport sources from CVS, similar to checkout
    history hi hisShow repository access history
    import im impImport sources into CVS, using vendor branches
    info infDisplay information about supported protocols
    init  Create a CVS repository if it doesn't exist
    log loPrint out history information for files
    login logon lgnPrompt for password for authenticating server
    logout  Removes entry in .cvspass for remote repository
    ls dir listList files in the repository
    lsacl lsattr listpermList the directories Access Control List
    passwd password setpassSet the user's password (Admin: Administer users)
    rannotate rann raShow last revision where each line of module was modified
    rchacl rsetacl rsetpermChange the Access Control List for a directory
    rchown rsetownerChange the owner of a directory
    rdiff patch paCreate 'patch' format diffs between releases
    release re relIndicate that a Module is no longer in use
    remove rm deleteRemove an entry from the repository
    rename ren mvRename a file or directory
    rlog rlPrint out history information for a module
    rlsacl rlsattr rlistpermList the directories Access Control List
    rtag rt rfreezeAdd a symbolic tag to a module
    server  Server mode
    status st statDisplay status information on checked out files
    tag ta freezeAdd a symbolic tag to checked out version of files
    unedit  Undo an edit command
    update up updBring work tree in sync with repository
    version ve verShow current CVS version(s)
    watch  Set watches
    watchers  See who is watching a file
    xdiff xdShow differences between revisions using an external diff program


  28. To display a list of cvs options, type: cvs --help-options

    OptionDescription
    -H Displays usage information for command.
    -Q Cause CVS to be really quiet.
    -q Cause CVS to be somewhat quiet.
    -r Make checked-out files read-only.
    -w Make checked-out files read-write (default).
    -t Show trace of program execution (repeat for more verbosity) -- try with -n.
    -v CVS version and copyright.
    -T tmpdir Use 'tmpdir' for temporary files.
    -e editor Use 'editor' for editing log information.
    -d CVS_root Overrides $CVSROOT as the root of the CVS tree.
    -f Do not use the ~/.cvsrc file.
    -F file Read command arguments from file.
    -z # Use compression level '#' for net traffic.
    -c Checksum files as they are sent to the server.
    -x Encrypt all net traffic (fail if not encrypted). Implies -a.
    -y Encrypt all net traffic (if supported by protocol). Implies -a.
    -a Authenticate/sign all net traffic.
    -N Supress network share error. (UNSUPPORTED OPTION)
    -s VAR=VAL Set CVS user variable.
    -o[locale] Translate between server and client locale. Specifying a locale here overrides the default (autodetected on CVSNT 2.0.58+).
    -O Disable client/server locale translation.
    --version CVS version and copyright.
    --encrypt Encrypt all net traffic (if supported by protocol).
    --authenticateAuthenticate all net traffic (if supported by protocol).
    --readonlyServer is read only for all users.

  29. If you have problems with CVSNT you can use the cvsdiag.exe tool, type:

    cvsdiag

    You should see something like this:

    CVSNT Diagnostic output
    -----------------------

    Server version: 2.5.03 (Scorpio) Build 2260
    OS Version: Windows XP 5.1.2600 (Service Pack 2)

    CVS Service installed: Yes
    LockService installed: Yes

    :pserver: installed: Yes
    :sserver: installed: Yes
    :gserver: installed: Yes
    :server: installed: Yes
    :ssh: installed: Yes
    :sspi: installed: Yes
    :ext: installed: Yes

    Installation Path: C:\Program Files\CVSNT\
    Repository 0 Path: C:/CVSRepository
    Repository 0 Name: C:/CVSRepository
    Repository 1 Path: (no value)
    Repository 1 Name: (no value)
    Repository 2 Path: (no value)
    Repository 2 Name: (no value)
    Repository 3 Path: (no value)
    Repository 3 Name: (no value)
    CVS Temp directory: C:\CVSTemp
    CA Certificate File: C:\Program Files\CVSNT\cvsnt-default.pem
    Private Key File: C:\Program Files\CVSNT\cvsnt-default.pem
    Local Users Only: No
    Default LockServer: localhost:2402
    Disable Reverse DNS: No
    Server Tracing: No
    Case Sensitive: No
    Server listen port: 2401
    Compatibility (Non-cvsnt clients):
         Report old CVS version: No
         Hide extended status: No
         Emulate co -n bug: Yes
         Ignore client wrappers: No
    Compatibility (CVSNT clients):
         Report old CVS version: No
         Hide extended status: No
         Emulate co -n bug: No
         Ignore client wrappers: No
    Default domain: TARGA
    Force run as user:

    Temp dir readable by current user: Yes
    Repository0 readable by current user: Yes
    Temp dir writable by current user: Yes

    AV files detected:
    (none)

    Installed Winsock protocols:

    1001: MSAFD Irda [IrDA]
    1002: MSAFD Tcpip [TCP/IP]
    1003: MSAFD Tcpip [UDP/IP]
    1005: RSVP UDP Service Provider
    1006: RSVP TCP Service Provider


  30. The next step is to add CVS users see guide, "How to add CVS users."
    If you want to know more about how to use CVS see quick guide: "How to use CVS."