Eclipse


The Eclipse Workbench is an open source platform, designed by IBM and released to the open source community. It is an open, portable, universal tooling platform that provides frameworks, services and tools for building tools.

In essence the workbench provides the tool infrastructure. With this infrastructure in place, the tool builders are able to focus on the actual building of their tools. The workbench has been designed for maximum flexibility to support the development of tools for new technologies that may merge in the future.

Industry leaders Borland, IBM, Merchant, QNX Software Systems, Rational Software, RedHat, SuSE, TogetherSoft, and WebGain formed the initial eclipse.org board of directors and began work on the Eclipse open source project.

More information about The Eclipse Workbench can be found at:
http://www.eclipse.org

Eclipse FAQ can be found at:
http://wiki.eclipse.org/index.php/Eclipse_FAQs

The latest Eclipse version can be downloaded from: http://www.eclipse.org/downloads/

There are hundreds of plugins which you can add to Eclipse, for example plugins for testing, code management, uml, xml, etc. The Eclipse plugins can be found at: http://www.eclipseplugincentral.com/


Install GlassFish server adapter on Eclipse 3.4 (Ganymede)


Information
none

Operating system used
Windows Vista Home Premium SP 1

Software prerequisites
Eclipse 3.4 (Ganymede)
J2EE 5 + GlassFish

Procedure
  1. Start Eclipse.

  2. Select menu: File | New | Other

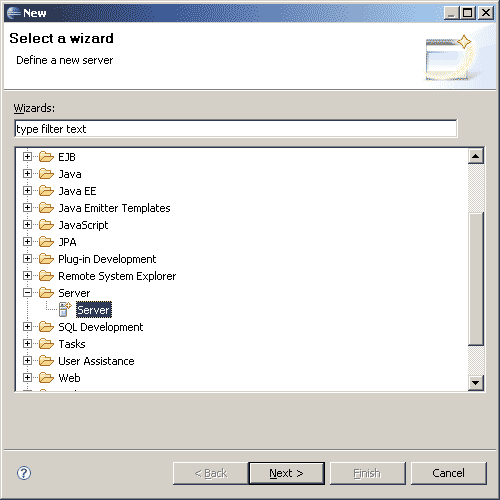
  3. Expand folder Server, select "Server" and press Next button.

    Select server

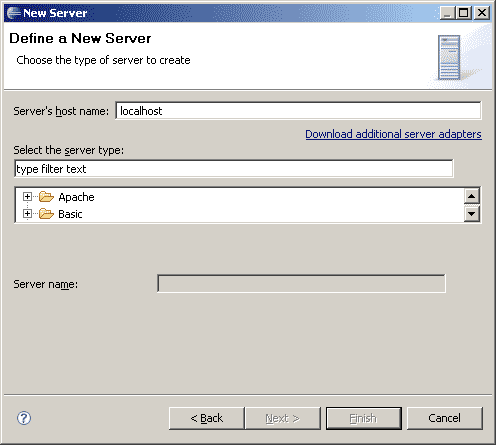
  4. Click link "Download additional server adapters".

    Download additional server adapters

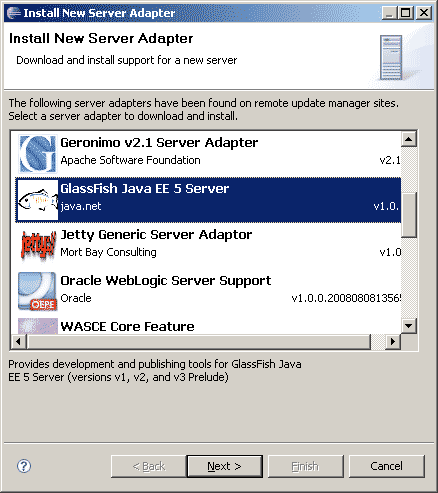
  5. Select GlassFish Java EE 5 Server and press Next button.

    Select GlassFish Java EE 5 Server


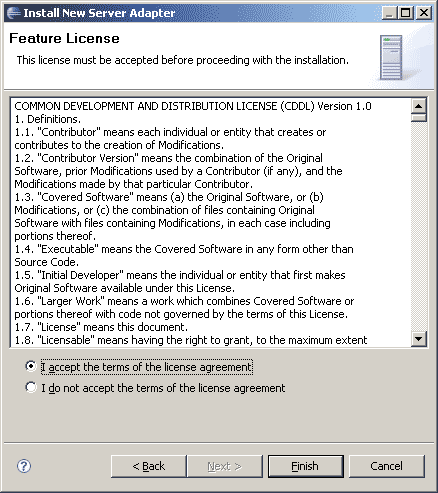
  6. Read and accept the license agreement and press Finish button.

    License agreement

  7. Restart Eclipse.

  8. Again:
    • Select menu: File | New | Other
    • Expand folder Server
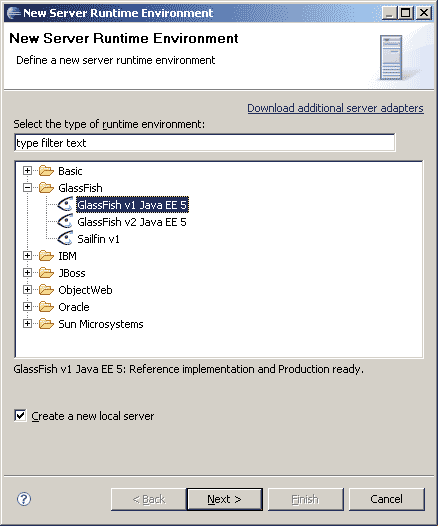
    • Select a GlassFish Server, for example: GlassFish v2 Java EE 5 and press Next button.

      GlassFish Server adapter installed

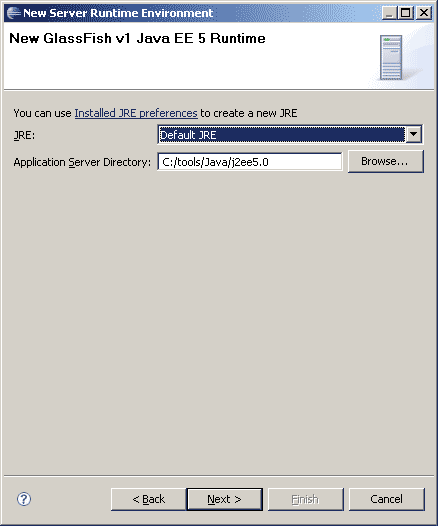
  9. Specify the Application Server Directory. This is the directory where you installed GlassFish and press Next button.

    GlassFish installed directory

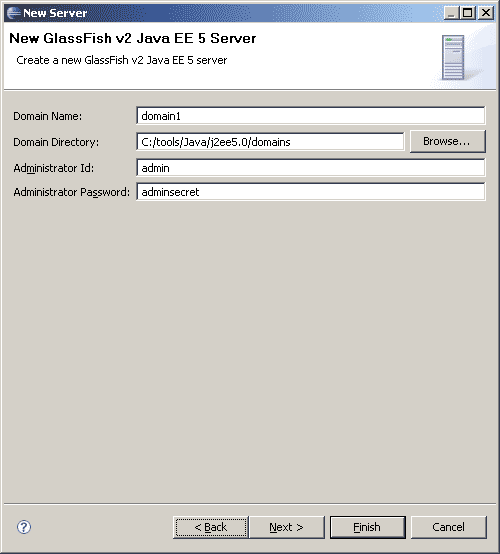
  10. Enter Domain and Administration information and press Next button.

    Enter Domain and Administration information

    For example:
    Domain directory: C:/tools/Java/j2ee5.0/domains
    Domain name: domain1
    Administrator Id: admin
    Administrator Password: adminsecret

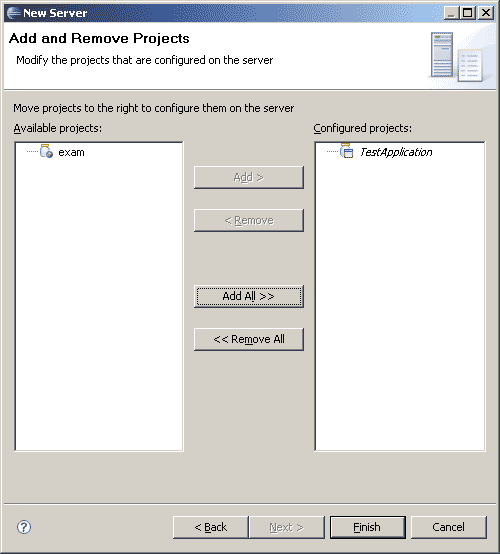
  11. Add your project and press Finish button.

    Add project