Eclipse


The Eclipse Workbench is an open source platform, designed by IBM and released to the open source community. It is an open, portable, universal tooling platform that provides frameworks, services and tools for building tools.

In essence the workbench provides the tool infrastructure. With this infrastructure in place, the tool builders are able to focus on the actual building of their tools. The workbench has been designed for maximum flexibility to support the development of tools for new technologies that may merge in the future.

Industry leaders Borland, IBM, Merchant, QNX Software Systems, Rational Software, RedHat, SuSE, TogetherSoft, and WebGain formed the initial eclipse.org board of directors and began work on the Eclipse open source project.

More information about The Eclipse Workbench can be found at:
http://www.eclipse.org

Eclipse FAQ can be found at:
http://wiki.eclipse.org/index.php/Eclipse_FAQs

The latest Eclipse version can be downloaded from: http://www.eclipse.org/downloads/

There are hundreds of plugins which you can add to Eclipse, for example plugins for testing, code management, uml, xml, etc. The Eclipse plugins can be found at: http://www.eclipseplugincentral.com/


Building and running a J2ME midlet and creating a deployed package.


Information
This guide explains how to build and run a J2ME midlet and how to create a deployed package, using Eclipse. You need to install Eclipse, J2ME Wireless Toolkit and the EclipsMe J2ME plugin first before you follow this guide.

Operating system used
Windows XP Home Edition Version 5.1 SP 2

Software prerequisites
Eclipse version 3.0 or higher
J2ME Wireless Toolkit 2.2
EclipsME J2ME 0.7.0 plugin

Procedure
  1. Start Eclipse and switch to the created workspace c:\workspace_j2me.
    See guide "Installing EclipseME J2ME plugin"

  2. Select menu: File | New | Project

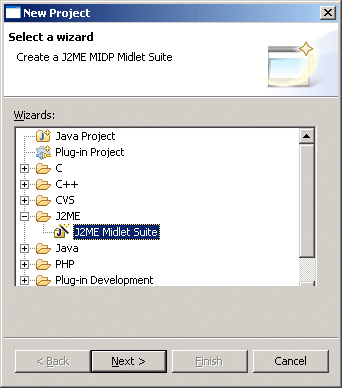
  3. Expand node J2ME and select J2ME Midlet Suite. Press Next button.

    Create new project.

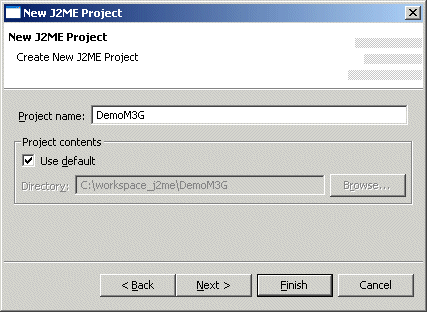
  4. Enter project name: DemoM3G. Press Next button

    Enter project name.

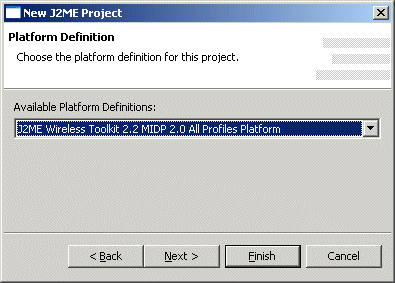
  5. Select "J2ME Wireless Toolkit 2.2 MIDP 2.0 All Profiles Platform". We need this platform because it provides support for mobile 3D graphics by implementing JSR 184. Press Next button.

    Select Wireless Toolkit.

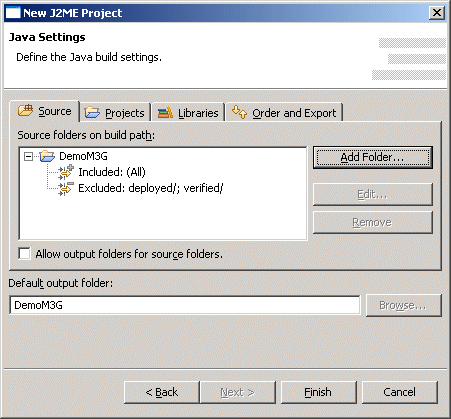
  6. In tab Source, press button "Add Folder".

    Add source folder.

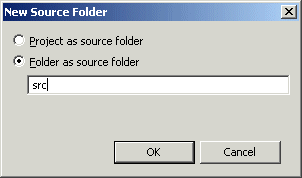
  7. Select radio button "Folder as source folder" and enter: src. Press OK button twice.

    Enter src folder.

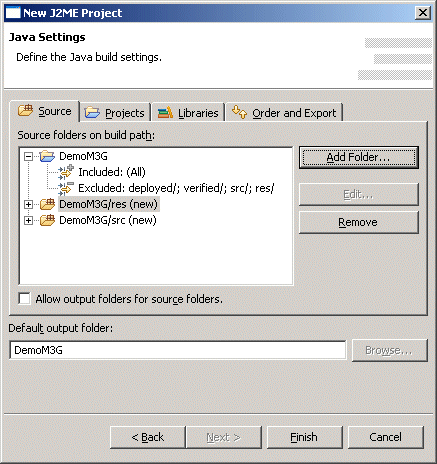
  8. Again, add another folder. Select radio button "Folder as source folder" and enter: res. Press OK button twice.

    Enter res folder.

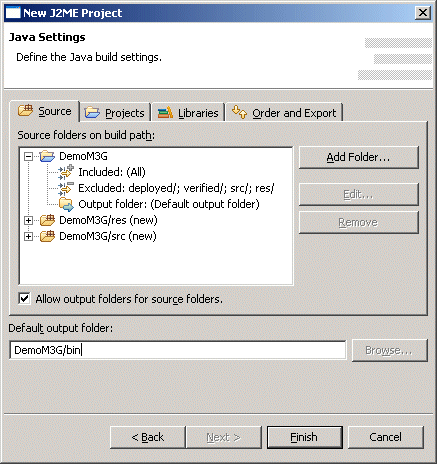
  9. Enable checkbox "Allow output folders for source folders" and enter in textbox "Default output folder" the following: DemoM3G/bin. Press Finish button.

    Enter bin folder.

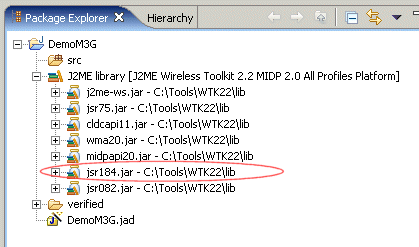
  10. Project DemoM3G is created. Make sure the library jsr184.jar is available.

    Project DemoM3G created.


  11. The J2ME Wireless Toolkit 2.2 already has some sample code available.
    To test your Eclipse environment copy the following folders from the J2ME Wireless Toolkit to your Eclipse IDE:

    • Copy C:\Tools\WTK22\apps\Demo3D\src\com

      and paste it direcly in Eclipse under folder DemoM3G/src

    • Copy C:\Tools\WTK22\apps\Demo3D\res\com

      and paste it direcly in Eclipse under folder DemoM3G/res

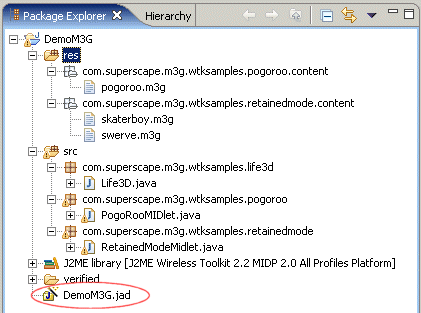
    You should see:

    Copy source code.

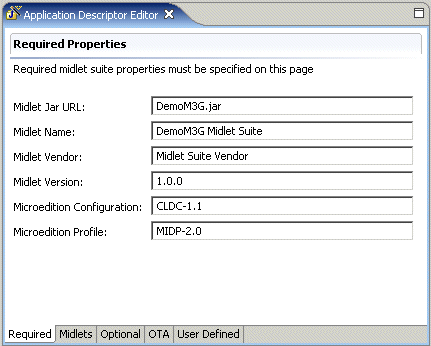
  12. Double click on file DemoM3G.jad. In the "Required" tab you can change the required properties. In this example, we are not changing the default values.

    Required properties.

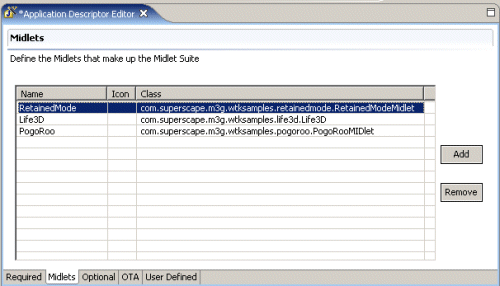
  13. Select tab "Midlets" and enter the following values:

    NameClass
    RetainedModecom.superscape.m3g.wtksamples.retainedmode.RetainedModeMidlet
    Life3Dcom.superscape.m3g.wtksamples.life3d.Life3D
    PogoRoocom.superscape.m3g.wtksamples.pogoroo.PogoRooMIDlet


    Define midlets.

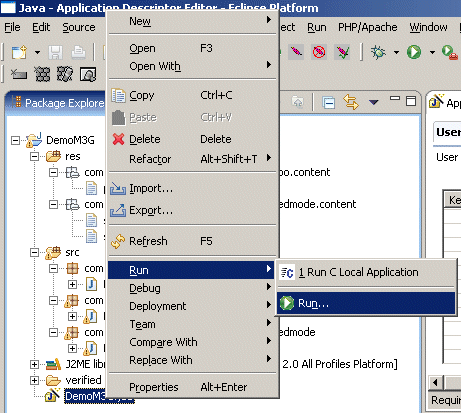
  14. Right click file DemoM3G.jad and select menu: Run | Run ..

    Select menu Run

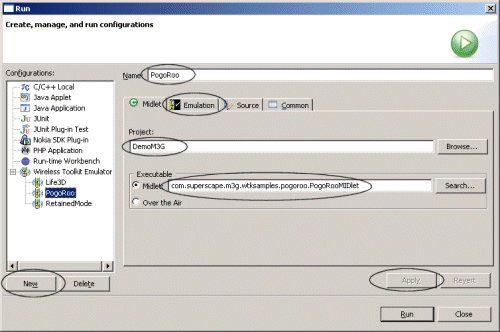
  15. In the Run window, create a new wireless configuration by pressing button New.

    • Enter Name: PogoRoo
    • Select Project: DemoM3G
    • Select Midlet: com.superscape.m3g.wtksamples.pogoroo.PogoRooMIDlet
    • Select Tab: Emulation and select radio button: "Project Platform Definition".
    • Press Apply button.
    • Repeat the same steps for the midlets: Life3D and RetainedMode.
    • Press Close button.


    Wireless run configuration.

  16. To run a midlet, right click file DemoM3G.jad and select menu: Run | Run ..

    Select menu Run

    In the Run window, select a wireless configuration for example: PogoRoo and press button Run.

    Wireless run configuration.

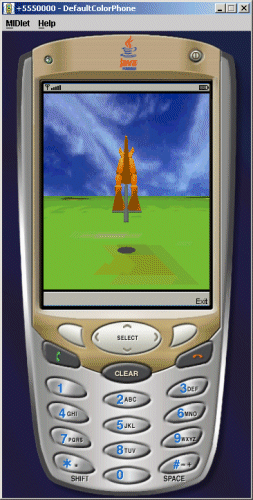
    The emulator windows pops up.

    Run PogoRoo.

  17. To create a deploy package:

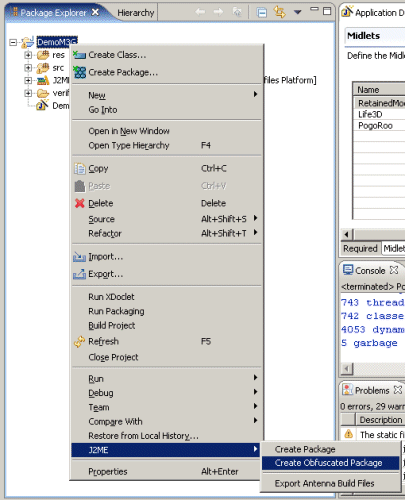
    • Right click project DemoM3G.
    • Select menu: J2ME | Create package OR J2ME | Create Obfuscated Package

      Create package

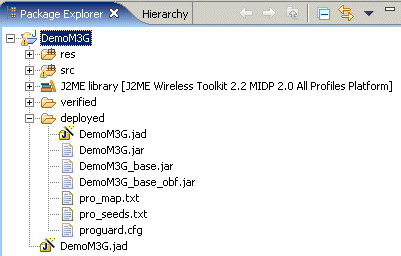
    • A directory "DemoM3G/deployed" is created, containing the DemoM3G.jad and DemoM3G.jar

      Deployed directory.